
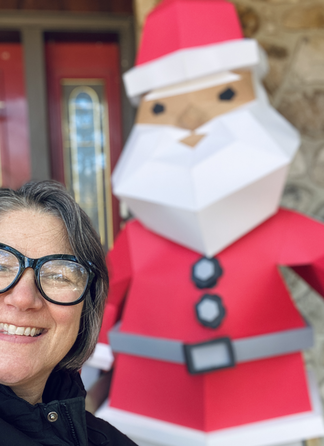
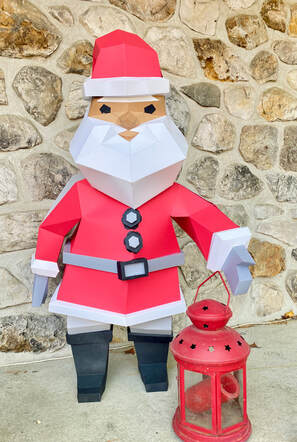
Join me in making a 5 foot paper Santa using A3 cardstock of 130 lb!! To start you will need a printer that can print big paper like canon pro 200 or you can also use a laser cutting machine like Glowforge. Perhaps a CNC machine or also the new large format die cutting machine like Cricut would work. You can also just buy the kit from either us or your favourite 3D papercraft designer. NEED: If you want to make sure your Santa can stand for a while, I recommend at least 130 pound paper card stock. You will also need some very strong double side tape, the industrial kind, and I like to reinforce the inside seams with packing tape. If you can and have the inclination you could also use resin epoxy once you are done. This would basically turn your cardstock Santa into a plasticized version if you will. I have also posted some more pictures and videos on my Instagram and TikTok channel @sofsdesigns Have fun, take your time and watch your Santa come to life! In the video above you can see the start of the process and my studio helper Mr .Toby the big Cat.
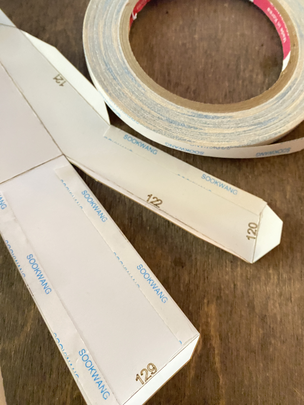
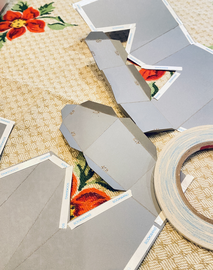
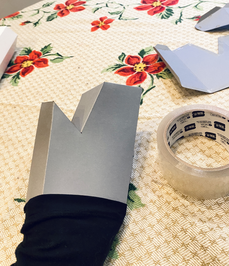
I use this double side tape which is awesome and you can tear it so no need to cut every little piece. For big project like this one however, ! also use packing tape on the inside seams as seen above.
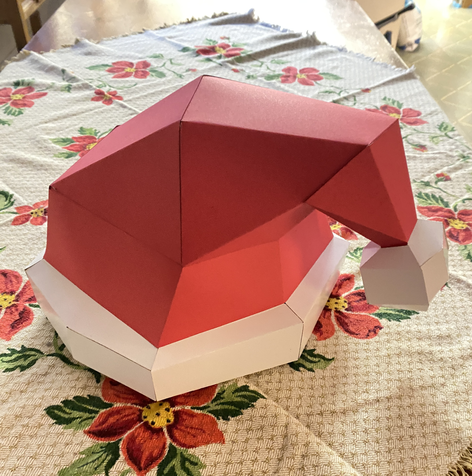
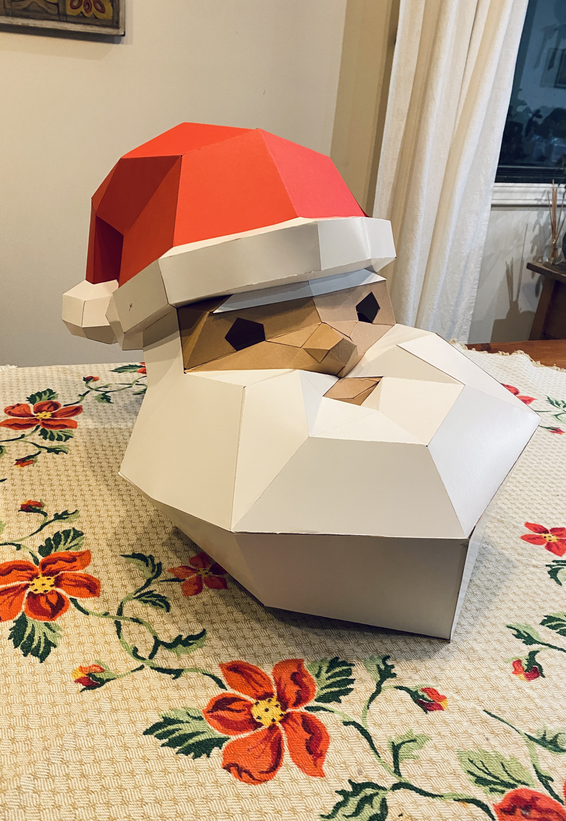
Here he is finished!! He's 4 feet tall and sooo cute! Even my 'other' Studio helper Salie, the chocolat lab, loved him right away.
I'm thinking he would be cute upside down trying to go through the chimney or propped up on a chair adding ornaments to your tree. Any which way, he will delight the whole family. Thanks so much and please don't hesitate to ask questions if you get stuck. Have fun, Cheers, Sophie XOXO
0 Comments
Yes you read correctly- make it out of Beer CANS or Pop CANS!This Pop Can Art sculpture will be an awesome decoration for your home, office or garden. The crafting process can be challenging, requires considerable time and patience, but will be very rewarding and result in a unique and impressive piece of art, you will be proud of! We collaborated with Daniel Eglito from Australia to offer you this very cool project. Daniel modified our Peace hand template so that you can make it out of Cans. Daniel started to make these types of Can sculptures during the Covid-Lockdowns (which he says were long and brutal here in Australia). He started doing a papercraft tiger head with my daughter and then was looking for a more challenging craft to recycle an abundance of beer cans after a backyard BBQ. Over time he has created more sculptures as home and garden decorations and have sold some when moving house recently. This was when he realized how much people like the sculptures and would like to craft them themself. He was right, see photos, its amazing! Daniel wrote to us and we loved his idea right away. His instructions are detailed and clear and you will be able to recycle and reuse those great aluminum cans! You can make them and sell them if you wish as well. You can use all kinds of cans, e.g. beer or soda drink cans; the chosen color will make the sculpture unique and there are various options for your you when designing the craft. You might choose the same color for the full sculpture or you could mix and match different colors for distinguished features or it’s also possible to use the inside of the car (silver side) for the entire or parts of the sculpture. There are just simple tools and material required (glue isn’t one of them!): ● Knife or box cutter ● Strong and paper scissor ● Protective Gloves ● Sticky tape ● Ruler ● Templates printed on A4 paper or letter size ● Aluminium can of your choice (seen in pictures are Australian Beer Cans) 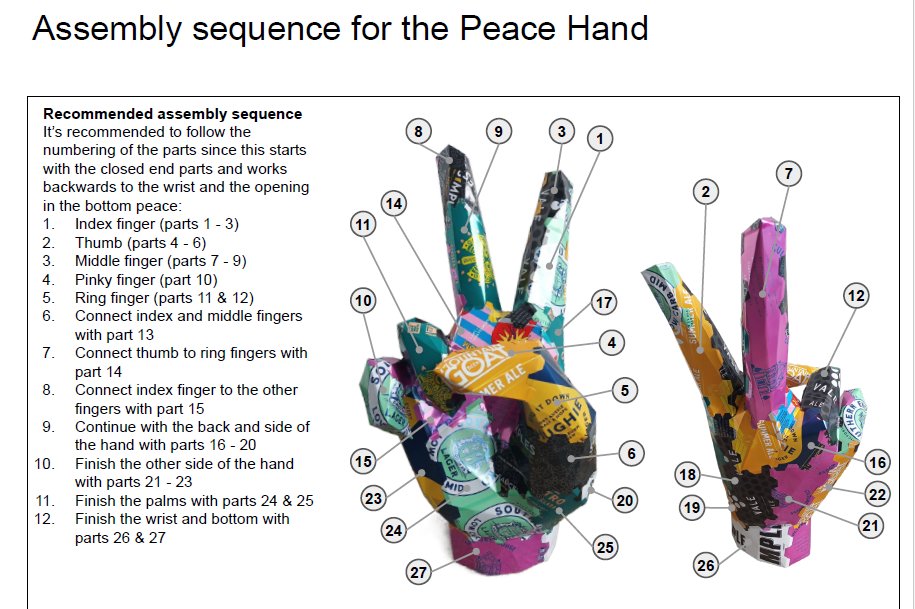 The Peace Hand Can Pop Art Craft 3D is one pdf file, containing detailed instructions with important tips, tricks and security warnings. The templates contain 27 parts, requiring about 25 aluminium cans. The dimension of the final sculpture will be about 34 x 20 x 18 cm. Take your time, have fun and show us the results by posting your makes on Instagram @sofsdesigns #sofsdesigns Cheers, Sofs and Daniel 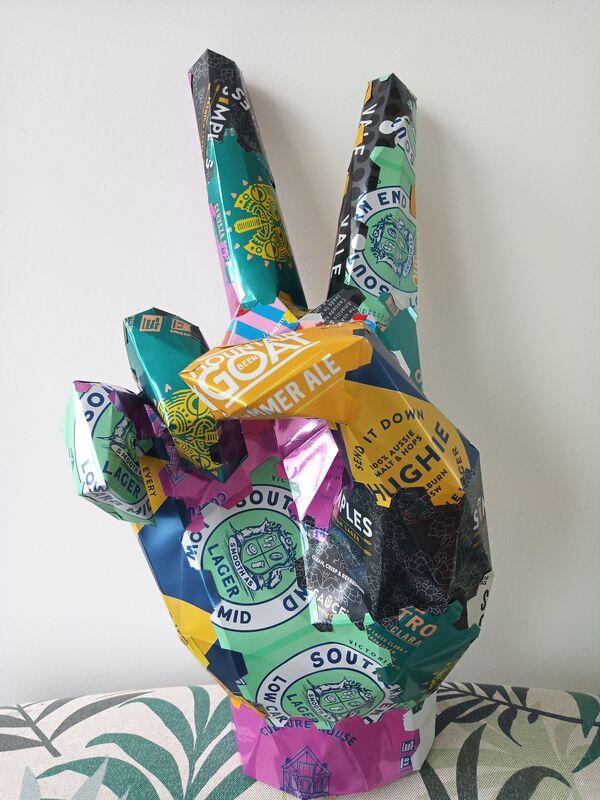 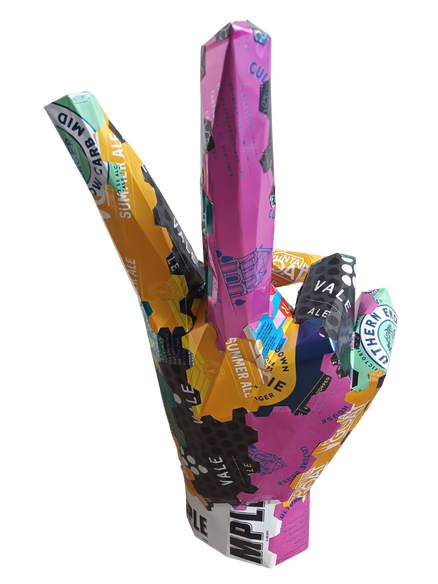 The dreaded last piece of your papercraft has got you frustrated? Here is an amazing trick! *refer to the images below for a visual. On our patterns there are some notes that help you orient yourself as you make your Papercraft. One of the note will say last piece. It will also sometimes say something like ' cut a hole so you can reach inside for easier assembly' This always helps as you can actually reach inside to glue your last few tabs however depending on your preferences, yo might want to have a fully 'closed' Papercraft. This is where this trick will be your new best move!! First step: Where it says last piece, print the piece twice. (If you received your Papercraft Kit already printed by mail, just keep the remaining left-over pieces of same color cardstock aside.) Second step: Cut your first last piece so you can finalize your make and then using the second piece (which should not have any tabs) just glue in place on top! (if you have remaining same color cardstock instead just cut a piece similar to the hole you made but a big bigger and glue on top of your hole).
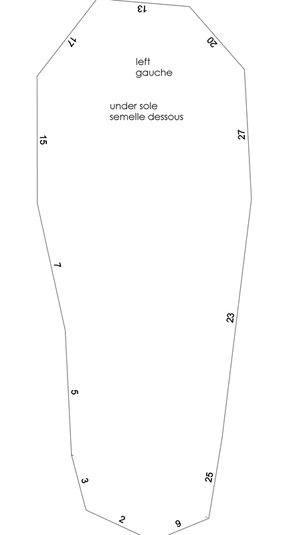
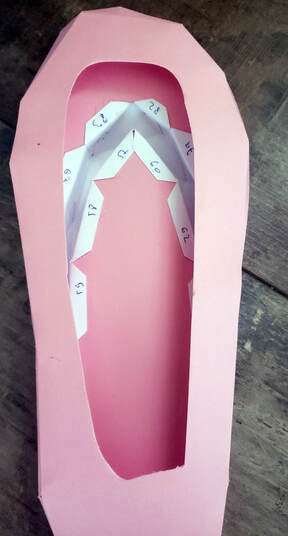
 Here is a video tutorial on how to use our 3D papercraft patterns with your Glowforge. Thank you! In the world of papercraft we see all kinds of things, and we also see giant things! If you’ve wanted to try to make a bigger size papercraft for a long time, but weren’t sure how to, here are some tips. Here is my journey: Little by little I researched the ways to do it and especially the necessary tools and materials. The rest is easy. When I say easy, let me explain: Once I've equipped myself with the right paper (130 lb cardboard) and a large format printer, the rest is a matter of DIY. You can use our Kits (already printed on the right size and thickness paper). Here is what you will need to get you set-up! Construction of the beautiful 6-foot bear: And so here is what I needed: template (see here) Polar Bear A blade about $12 (I bought at staples) 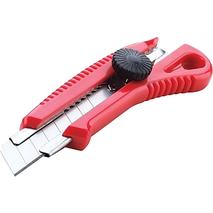 A self-healing cutting mat that cost me about $45 (staples) 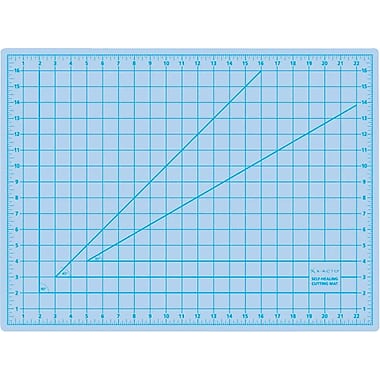 Gluing Method #1 : Also, lately I changed my technique and use double sided tape with a double sided tape dispenser. It's a bit more expensive with a value ranging from about $50 to $75. I also bought 'heavy duty' tape. For most projects, regular double side tape works but bigger needs stronger tape. The cost of the tape is significant and I bought that at uline.ca 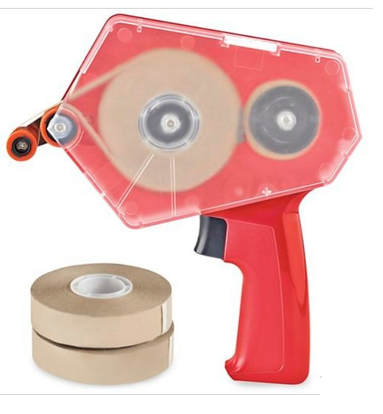 Gluing Method #2: On the other hand, a stick of glue at $4 does the trick too! My favorite is the red, the pritt. Here you will have to tape your seams once the glue dries (from the inside with packaging (clear) tape). This is the less expensive method and it takes a bit longer but works! And that's it, the rest is manual but simple. You have to do a little every day or set-up a weekend aside. The pattern pieces are cut and 'scored ' (I take the back of the knife with a ruler and I slide on the dotted lines.) By the way, scoring the lines to fold is an important part. A bit annoying but folding will be much better! The rest, well, it's like a mix between making a puzzle and painting by number. Just find the numbers that go together, so 1 with 1, 2 with 2...and glue them! HERE is the result: breathtaking every time!!  Wanna have your 3D Papercraft last ? You have young ones that like to touch and play with your Lowpoly Paper models? NO PROBLEM! They are sturdier then you might think.You can harden your models with resin epoxy ( see our other post) but you can also stuff them like you would a plush fabric toy. You can use plush or you can also use crumbled newspaper to add strength. In the photo below, I added polyfill to the legs of my flamingo. It stands without but some of the models will be used as model displays so I reinforce them. 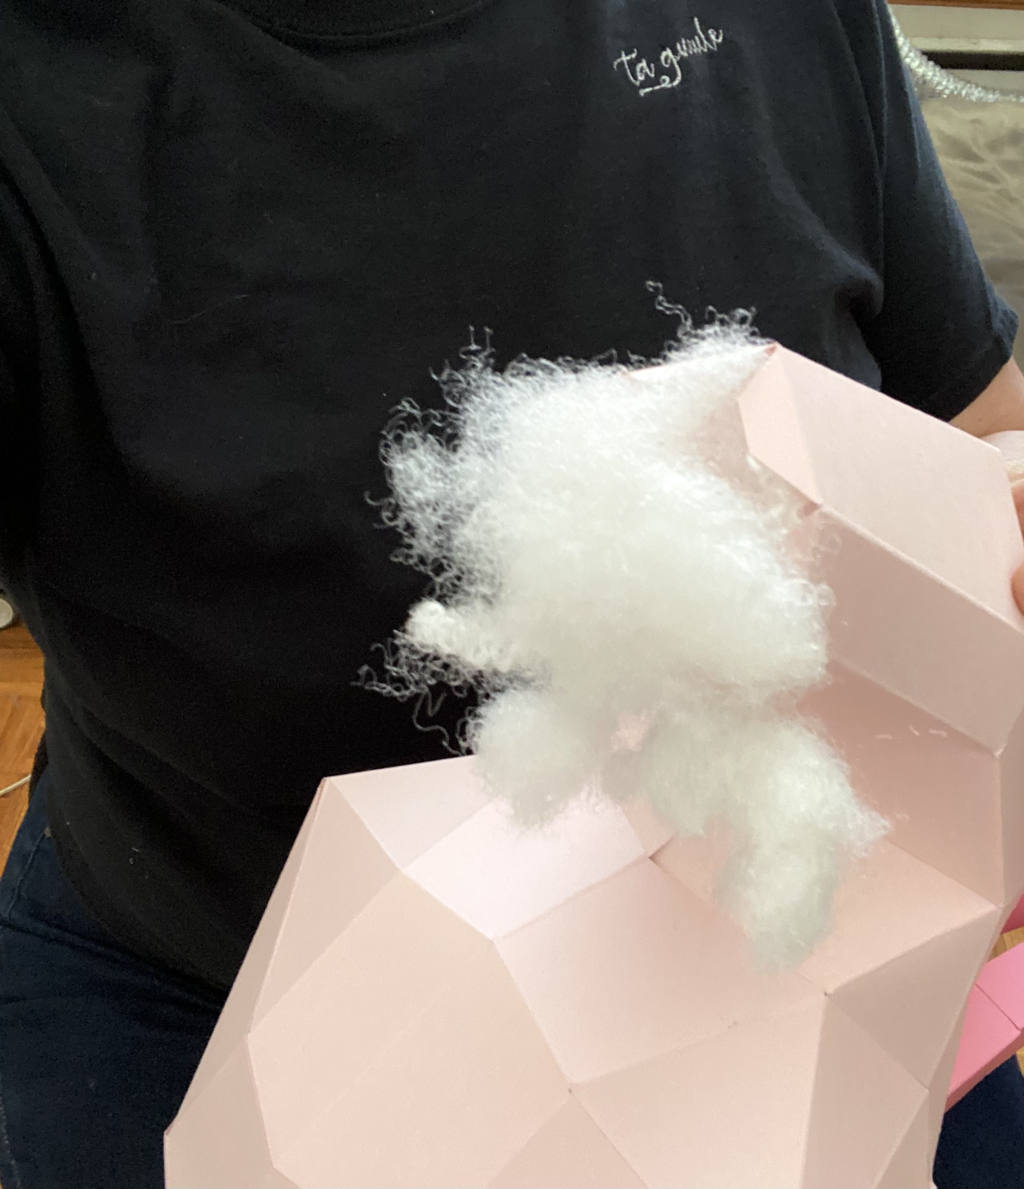 A visit to my old blog has reminded of all the years I have put in to this ‘Sofs’ adventure. Such a fun trip. I wrote about many fun projects like how to make a tunic with your photos! Go check it out —> http://sophiemarcoux.blogspot.com/  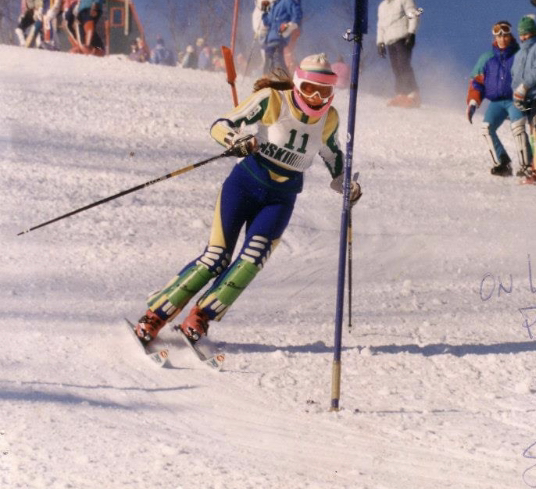 I feel sorry when people feel frustrated while making our 3D Papercraft kits. Lately I found that explaining the art of 3d papercrafting / Lowpoly Paper while comparing it to alpine skiing gives a pretty accurate visual.
While some of our kits are at the 'easy' level, there is still a necessary learning curve involved. Same for skiers who would take an easy hill for the first time, they would most likely feel that it was not very ‘easy’. Equally your first few 3D Papercraft kit may not seem very easy the first time around. However, if you make a second or perhaps third one, it will become a simple craft. That said we also offer many videos, pictures and explanation on our website to provide as much support as you need. Perhaps also just like skiing, some people will take to it and some won’t. We certainly did to both activities! ( as you can see in the above picture. This was me as a teen, I grew-up on the slopes!) We sure hope you will enjoy the experience but if you don’t its ok too! Best, Sofs
First, let me say that it works! So if you are here its most likely that, like me, you looked online to see if someone had done this experiment yet and found very little. I did find lots of people asking and talking about everything else they tried except this! Lots of people layered cement and epoxy but not actually mixed it.
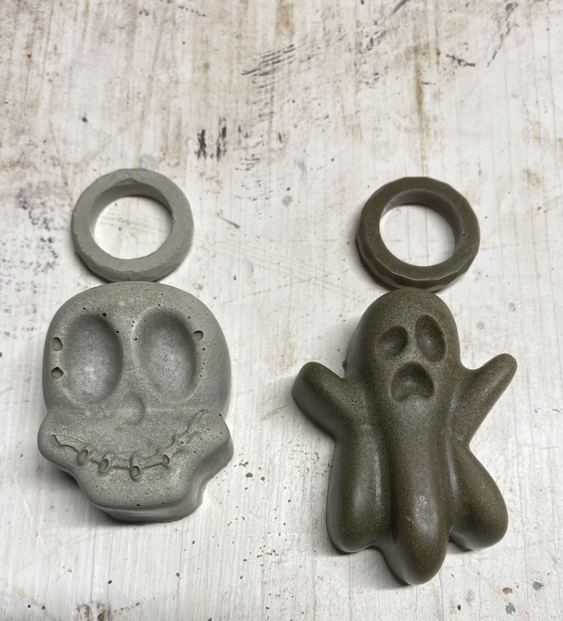
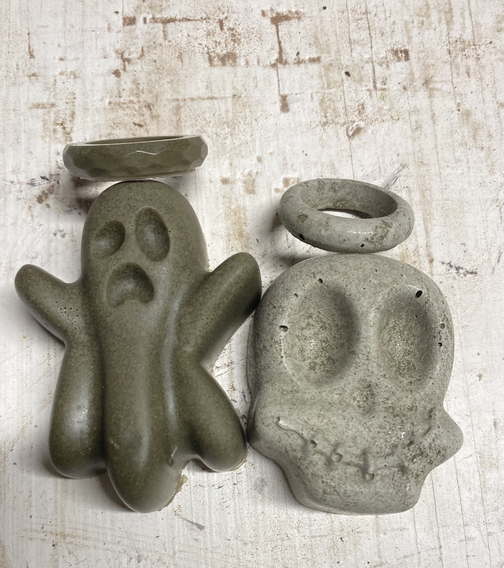
First I tried approximately ( everything is approximate!) 65% epoxy resin ( art resin) and 35% cement ( cement all quick setting) I mixed my epoxy first as per instructions and then I added my cement powder right in. (no water added) It worked super well. It came out darker and it sort of look like wet cement. It feels more like resin then cement and took a good 24 hours to fully cure. For m second try, I used the reverse so 65% cement and 35% resin. This time I mixed my cement as I would have normally except I kept it on the dryer side (a bit less water then I would normally). Then I mixed my resin as per instructions and mixed both substance. Again here it worked like a charm! This time it looks a but more like cement would and took a bit less time to dry although it still takes much more time then just the quick setting cement all. See picture above of the 2 resin mix with cement experiment. Darker more resin looking is the first try and second is this new ratio. I finally tried with even less resin to see if I can get that real cement feel ( grainy and sand feel versus the resin with is more plastic). I tried a 90% cement versus 10% resin ratio. It made the casting strong enough that my object did not break when I pulled it out of the mold and it feels like cement. Yay!! Here is a picture ( below) of the 3 different ratios although I don’t think it really shows. 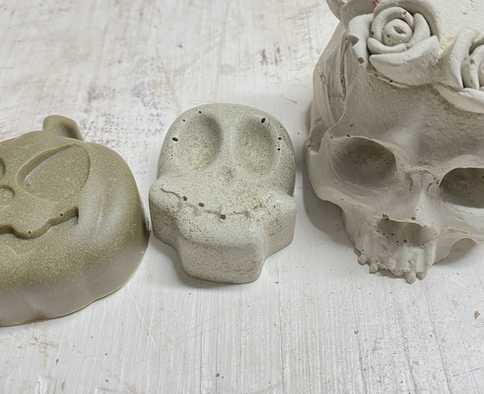
Comment accrocher votre licorne sur le mur vous dites? Facile, regardé! ( une punaise, un petit clou ou même du ruban double face. 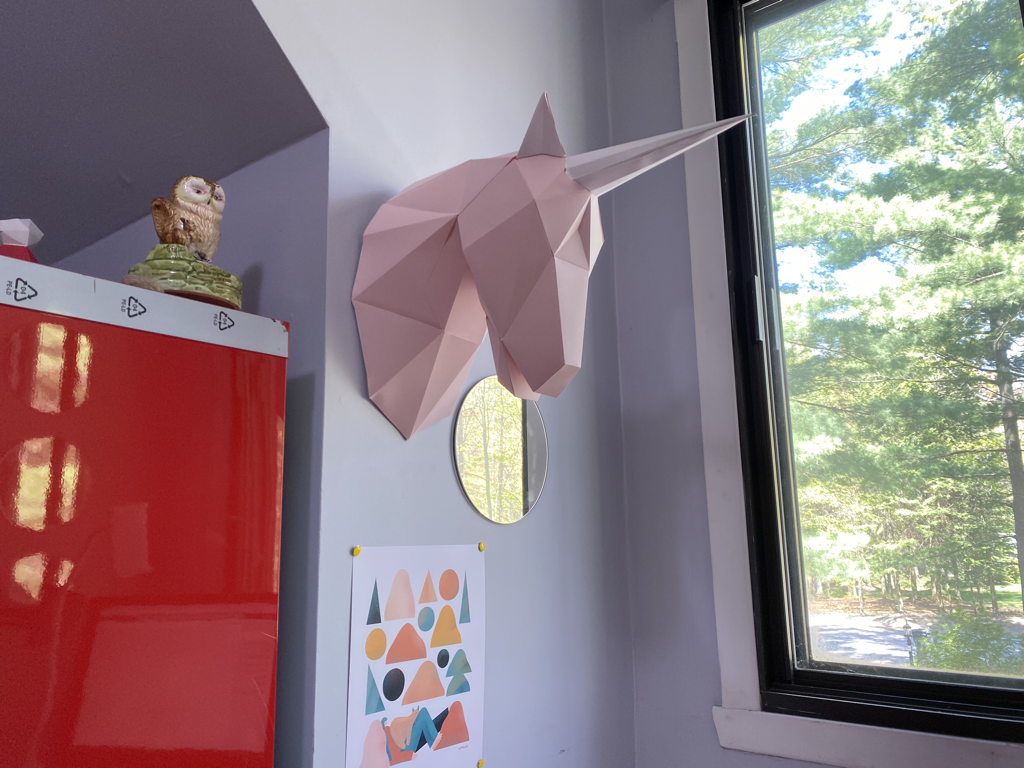 |
AuthorsMaker, owner, diy enthusiast, designer, artisan... Sofs is actively engaged in the pursuit of making it happen. Archives
November 2023
Categories
All
|

FREE SHIPPING FOR ALL CANADIAN ORDERS of $100 and more
AUCUN FRAIS D'EXPÉDITION COMMANDES CANADIENNES DE $100 +
AUCUN FRAIS D'EXPÉDITION COMMANDES CANADIENNES DE $100 +
service clientSee us on FAIRE wholesales
|
|
SOCIAL MEDIA
© 2024 Sofs designs
|