
|
A visit to my old blog has reminded of all the years I have put in to this ‘Sofs’ adventure. Such a fun trip. I wrote about many fun projects like how to make a tunic with your photos! Go check it out —> http://sophiemarcoux.blogspot.com/ 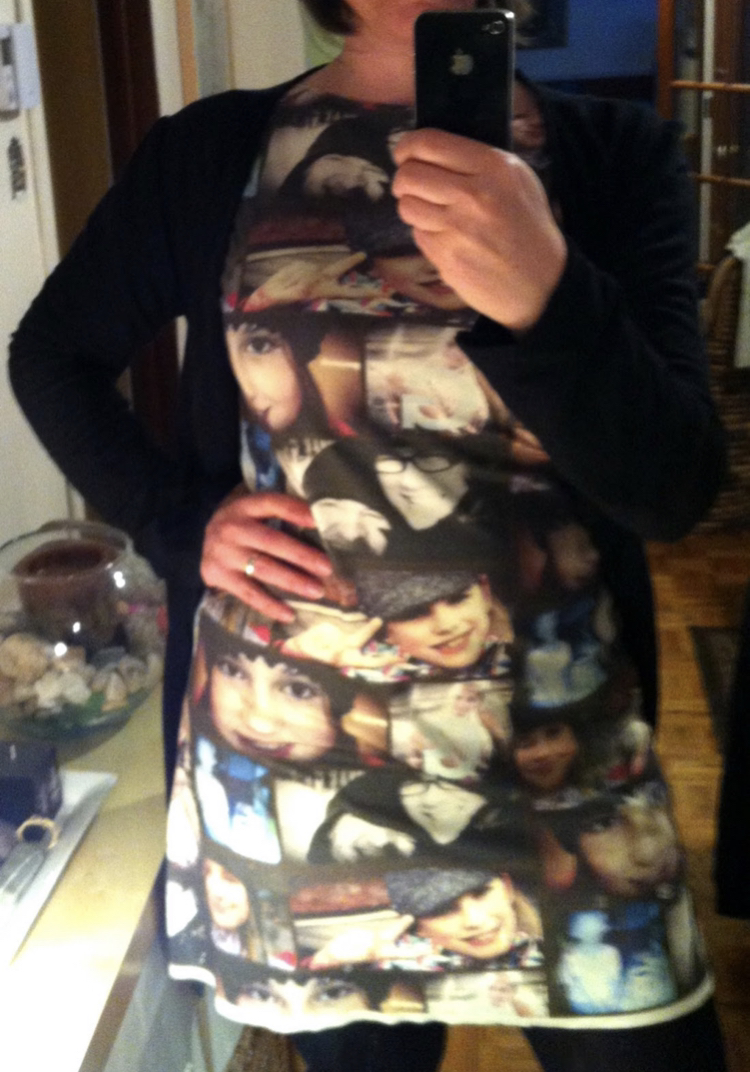
0 Comments
I want to give you joy!! Remember last year we offered a santa hat box? (scroll to find the free pattern!) Well this year we want to offer you this free Giant (24 inches tall) Candy Cane 3D Papercraft! It just feels right...I think we all need the bright and whimsical colors around. Enjoy! If its your first time at printing the patterns, head over to our how to pages for some support. (for starters, you just need to click the image to get the pdf pattern or click here!) Much love, Sofs 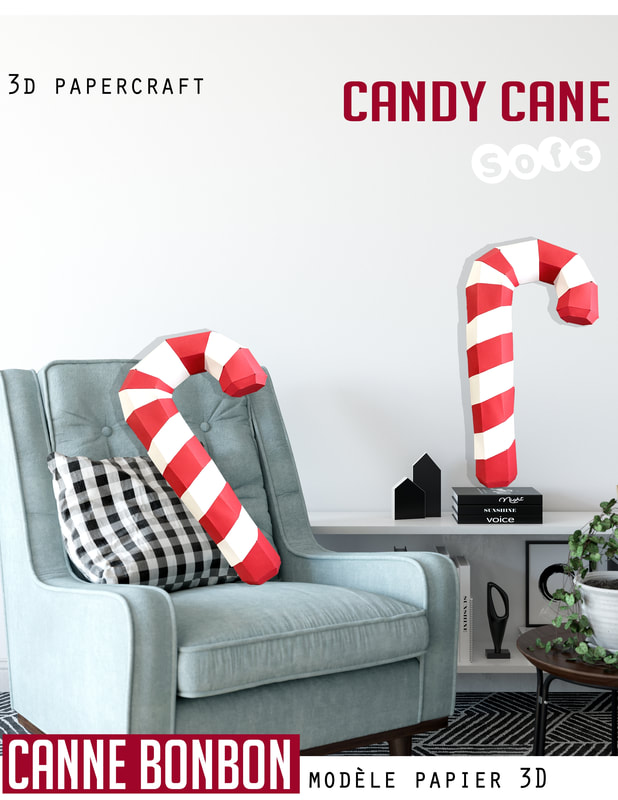 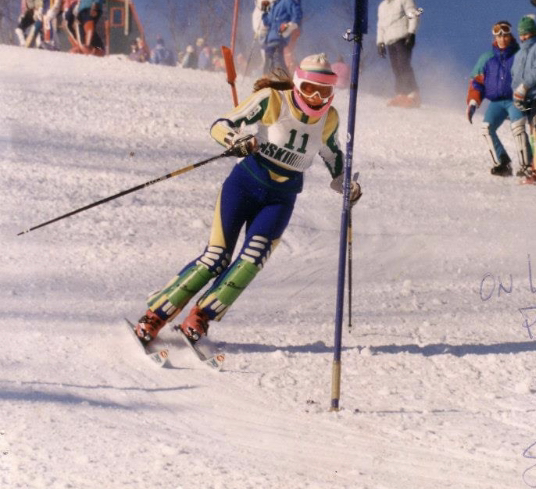 I feel sorry when people feel frustrated while making our 3D Papercraft kits. Lately I found that explaining the art of 3d papercrafting / Lowpoly Paper while comparing it to alpine skiing gives a pretty accurate visual.
While some of our kits are at the 'easy' level, there is still a necessary learning curve involved. Same for skiers who would take an easy hill for the first time, they would most likely feel that it was not very ‘easy’. Equally your first few 3D Papercraft kit may not seem very easy the first time around. However, if you make a second or perhaps third one, it will become a simple craft. That said we also offer many videos, pictures and explanation on our website to provide as much support as you need. Perhaps also just like skiing, some people will take to it and some won’t. We certainly did to both activities! ( as you can see in the above picture. This was me as a teen, I grew-up on the slopes!) We sure hope you will enjoy the experience but if you don’t its ok too! Best, Sofs
First, let me say that it works! So if you are here its most likely that, like me, you looked online to see if someone had done this experiment yet and found very little. I did find lots of people asking and talking about everything else they tried except this! Lots of people layered cement and epoxy but not actually mixed it.
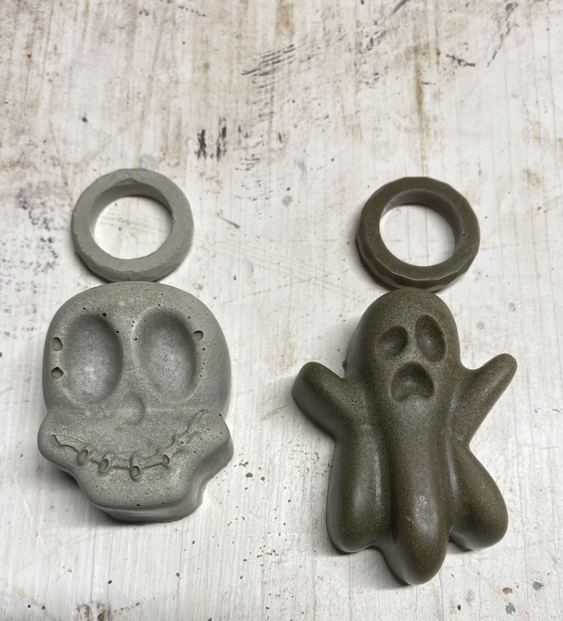
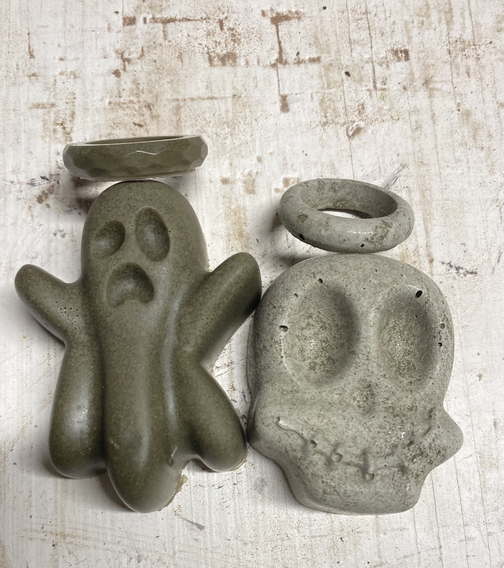
First I tried approximately ( everything is approximate!) 65% epoxy resin ( art resin) and 35% cement ( cement all quick setting) I mixed my epoxy first as per instructions and then I added my cement powder right in. (no water added) It worked super well. It came out darker and it sort of look like wet cement. It feels more like resin then cement and took a good 24 hours to fully cure. For m second try, I used the reverse so 65% cement and 35% resin. This time I mixed my cement as I would have normally except I kept it on the dryer side (a bit less water then I would normally). Then I mixed my resin as per instructions and mixed both substance. Again here it worked like a charm! This time it looks a but more like cement would and took a bit less time to dry although it still takes much more time then just the quick setting cement all. See picture above of the 2 resin mix with cement experiment. Darker more resin looking is the first try and second is this new ratio. I finally tried with even less resin to see if I can get that real cement feel ( grainy and sand feel versus the resin with is more plastic). I tried a 90% cement versus 10% resin ratio. It made the casting strong enough that my object did not break when I pulled it out of the mold and it feels like cement. Yay!! Here is a picture ( below) of the 3 different ratios although I don’t think it really shows. 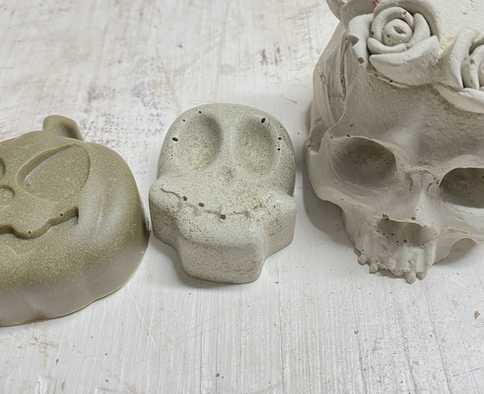
Oh my, oh my! I am a forever fan of this amazing magazine that has help and inspired me through the years. This summer, I am over the moon the say Sofs is in their Little U magazine #3 !! little U is a offspring of the Upper magazine. A smaller pocket book kinda mag. Check it out and also check out all the other amazing mags by uppercase. (hum hum, ... is also a made in Canada mag from Calgary!)   Comment accrocher votre licorne sur le mur vous dites? Facile, regardé! ( une punaise, un petit clou ou même du ruban double face. 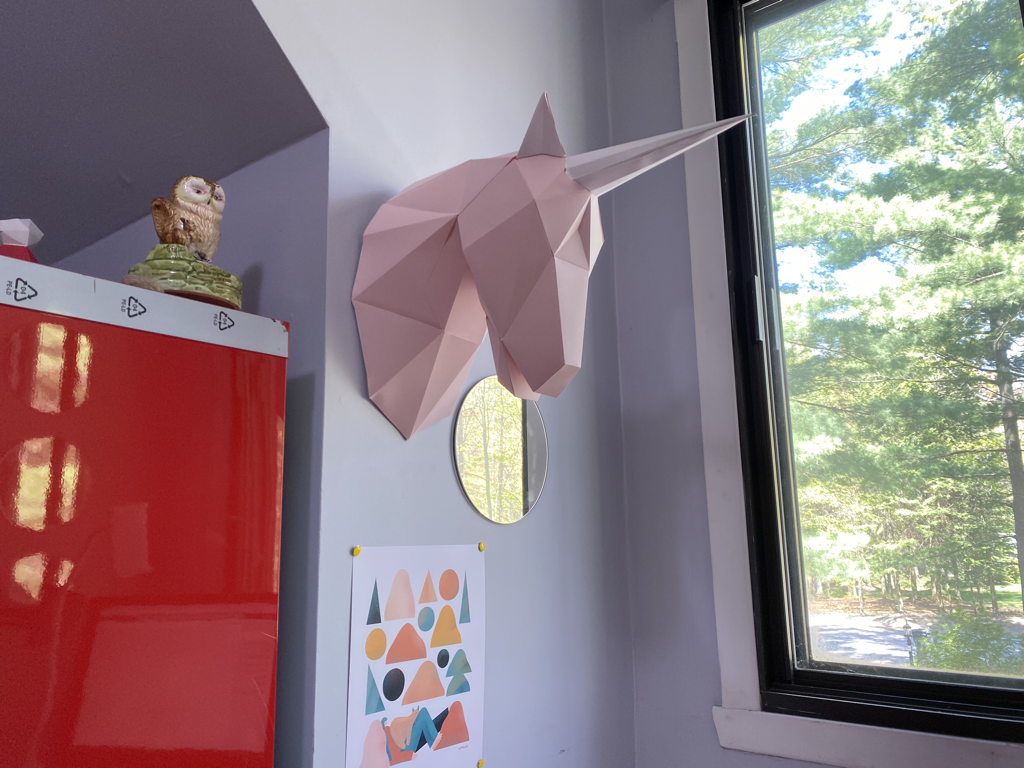 Ok so in the last week or so, I have had quite a bit of a learning experience trying to figure out the cricut design space for 3d papercrafting! Honestly I am writing this post so I can go back to it if I ever forgot how I prepared my svg files to use with cricut. If you have other tricks and helpful comments please SHARE! using dxf versus svgFor some unknown reason the cricut design space allows dxf files but was not able to read them properly even if they have seperate color lines. I had to resave my dxf into svg in adobe illustartor for the cricut software to allow for the different color lines to be separated into layers. transforming your numbers from text to vectorFor the numbers on your tabs to appear on your svg file, you need to transform them in some ways. They are a text format and they need to be a vector line (if that makes sense). What you can do is select one number and in your top menu choose 'select' then 'same' then 'appearance'. This should select all your numbers. From there in your menu choose 'type' then 'create ouline' this should do it. Save. coloring your score and cut lines'If has mentionned above you start with a dxf file your lines will already be colored so you can just save as an svg file and the colors will be set. If you start with svg or eps, you will need to select your fold lines (valley and montains) and color them. I start by selecting a mountain line (------) and choose in top menu 'select' then choose 'same' then 'apperance' in illustartor and it will automaticly select all mountain lines. I then change the color to blue. do the same with valley lines. Save. size of your svg fileThe issues here is that it doesn't register the 'artboards' or 'background' so it gives you the pieces in a group only which is fine if they are good to go but cricut doesn't allow you (or so I think) to resize by %. You can only do resizing by size of your grouping of pieces you have uploaded.
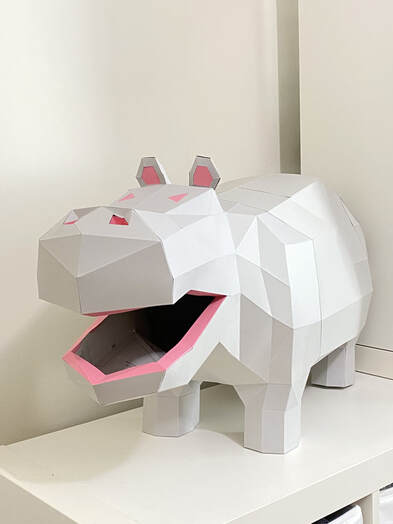
There are a 2 ways you can do this here. way 1: You can prepare your files and create trimming marks on each of you svg files. To do this you would selct all your pieces on your svg file in illustrator and choose from the top menu 'object' then create trim marks. If you don't have these on your files once you upload them in cricut they loose their 'artboards', it will make that size different for each grouping you upload which would scew the peice themselves and they would not fit together. way 2 Another way to do it is you need resize (enlarge or reduce) all grouping in each file to the same % before you upload them to cricut. You can do this in illustrator or inkscape which is a free software. Save. Ever wanted to use your die cutter to also score your lines?? I sure did. If you are like me you’ve wondered how you could score your lines with your scanncut! You could try embossing but that’s a bit too much when all you need a quick score on your fold lines. Well, after wondering for a long time and watching many YouTube videos, I figured it out! I felt that the tricks that people were using weren’t as user friendly as I had hoped so I tried this and it is AMAZING ! What you needAs you will see from the pictures below I am using a sdx225 so I am not sure if this technique will work for all models but I hope so! You will need to have the universal pen tool holder and then you need an old pen that has ran out of ink. I find that there is a specific size pen that you need as some are either to thin or some too thick. I found one that fit just right. 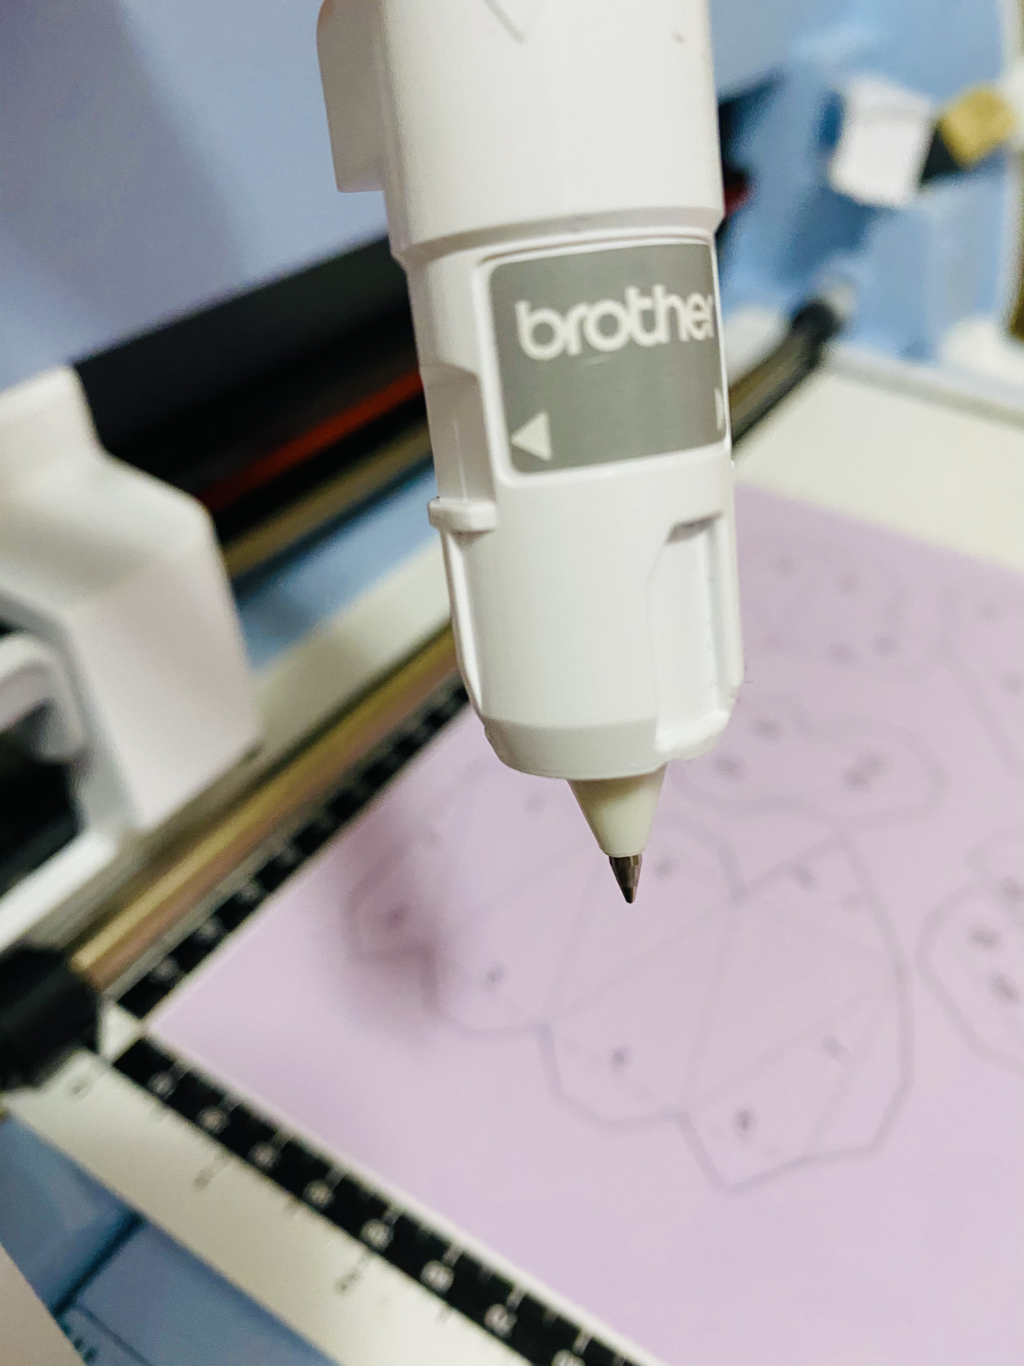 File preparationYou will need to set up your file to have your cut lines different from your score lines. I use my svg files from my papercraft designs ( you can find them with my digital downloads or email us if they are not already included when you get the pdf template). I print the pdf document first on cardstock, then I scan it and send it to my canvasworkspace. I finalize the preparation by setting up my svg file to match the scan. Once that’s done I set my score lines to ‘draw’. Settings on scanncutWhat is important here is that you set your draw functions to pressure: 9 ( max pressure). Also the speed should not be too fast. 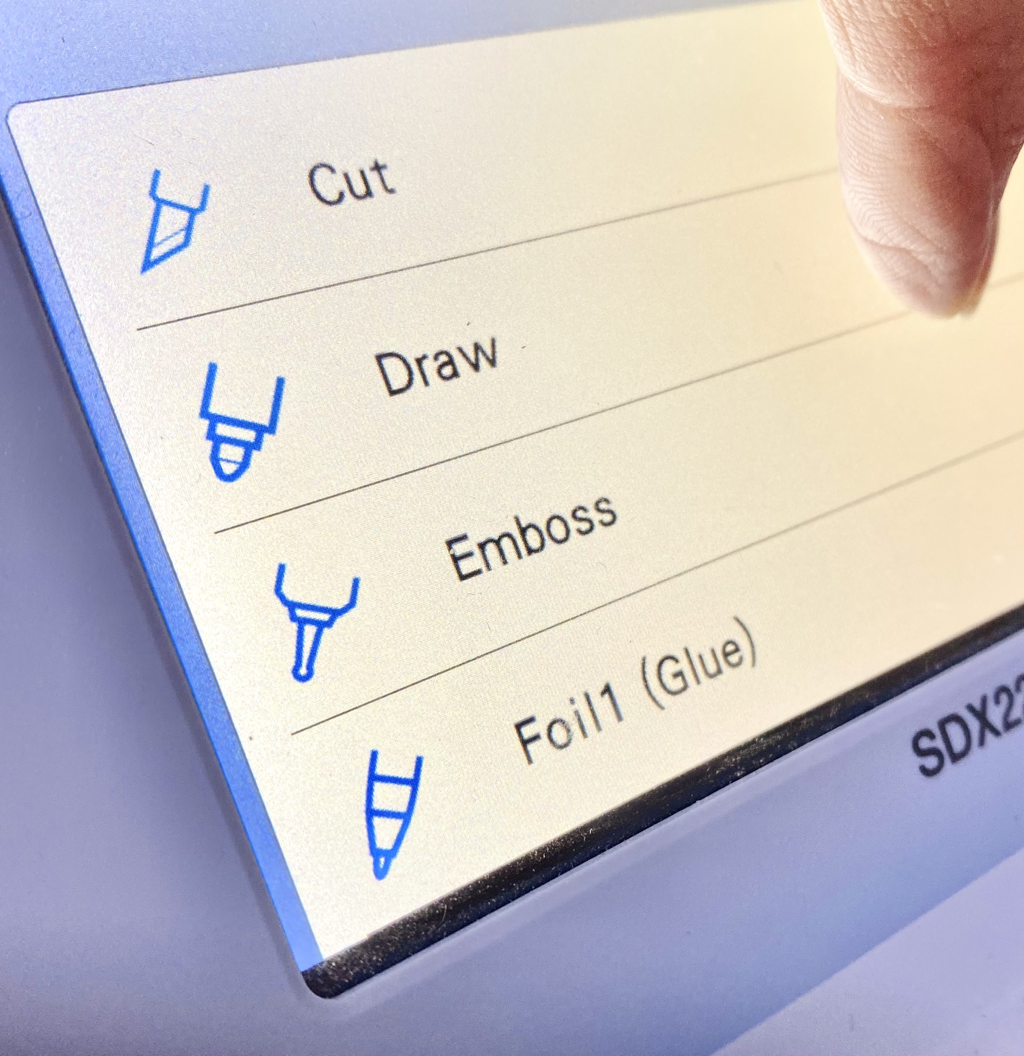 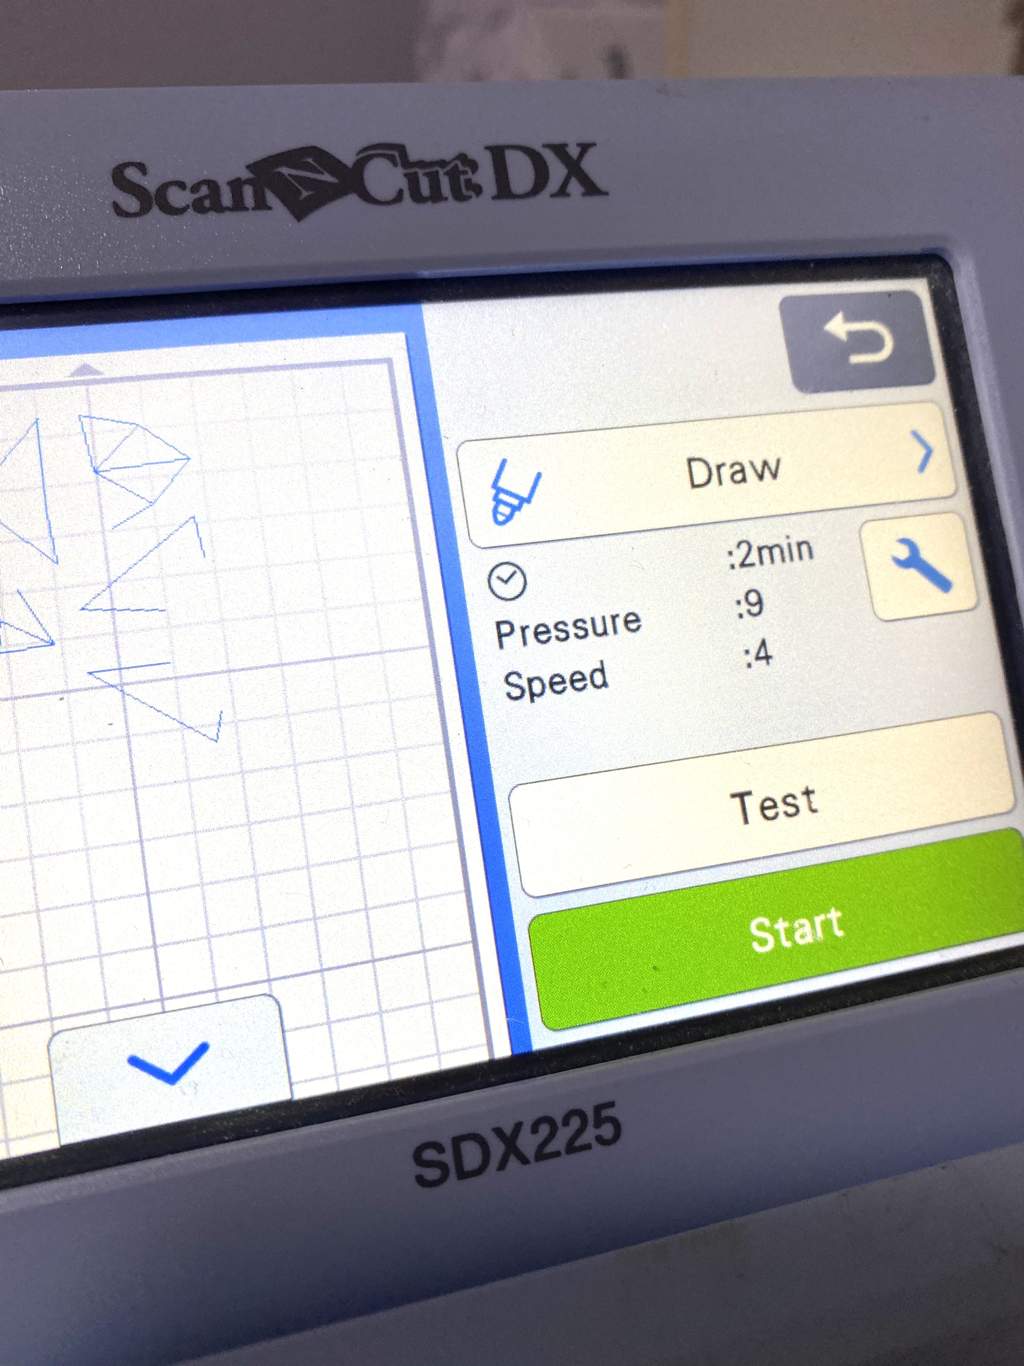 There you have it!! Scoring your lines has never been so easy!! You’re welcome! Let me know how it went for you. FIRST you make pink popcorn! Good start yes?! I used a recipe I found online here. You may need to try it a few times before you get the right texture or the right color. pssst you can also make it other colors for any other fun occasion. 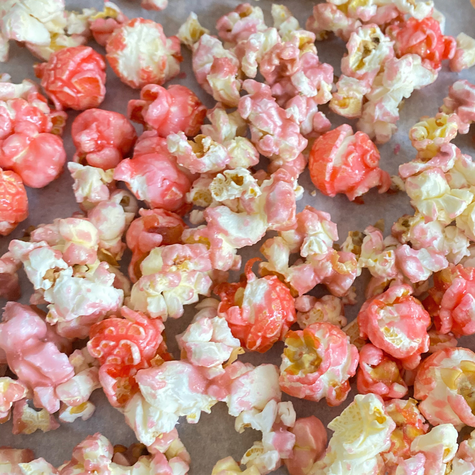 SECOND make a hippo! That’s the best part in my opinion ( of course!) You can purchase the kit which will sent to you or you can also purchase the digital download template. The template makes a BIG hippo ( 36 inches long) but you can also print it on a smaller scale to make samller ones (make sure to reduce eac page to the same %). Use the size that fits your need. I used the large one for the photo but how cool would it be to make a few of the mid size ones.
NOW you pretty much got all you need to surprise your loved ones! You can add a few cute drinks and a few balloons if you want. Either way, I think that you are sure to make this party memorable. Take some pictures and wow your social media friends!! we want to see too, find us on instagram @sofsdesigns 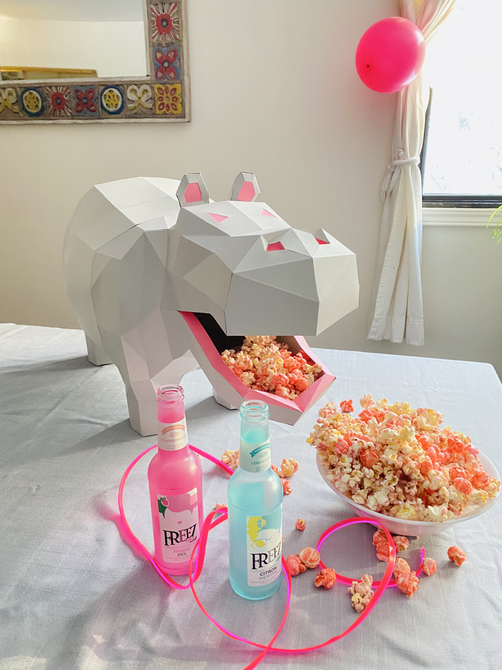 ENGLISH: It is obvious that I am not the most active blogger! But that won't let me stop me from trying..For this holiday season 2020 I give you a little gift and hopefuly the gesture will bring joy as we wrap up a cray cray year!! (click on image to open the pdf pattern.) Have fun, keep playing...Thank you so much for your support. FRENCH: Il est évident que je ne suis pas la blogueuse la plus active! Mais cela ne me permettra pas de m'empêcher d'essayer ... Pour cette saison des vacances 2020, je vous donne un petit cadeau et j'espère que le geste apportera de la joie alors que nous clôturons une année bananas !! (cliquez sur l'image pour ouvrir le modèle pdf.) Amusez-vous bien, continuez à jouer ... Merci beaucoup pour votre soutien. 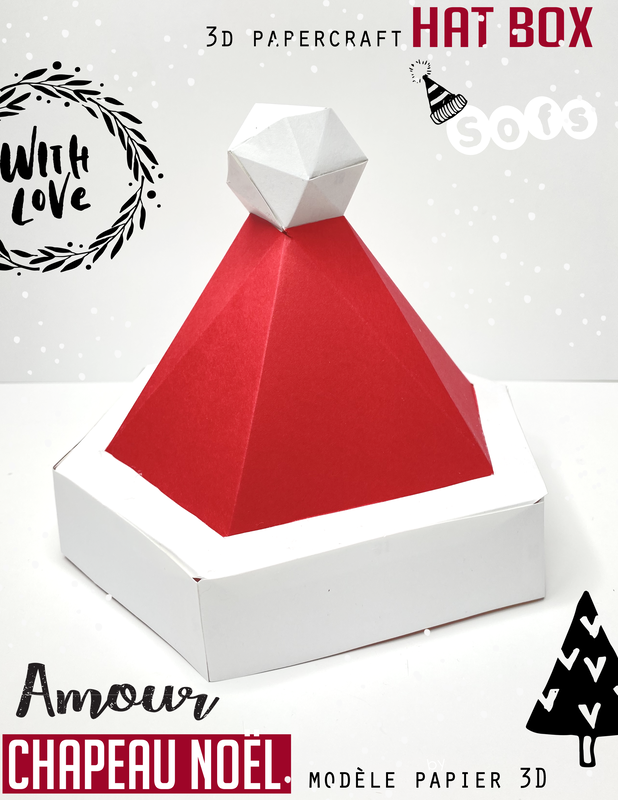 If you are new to the wonderful world of papercrafting, I made a little video! |

AuthorsMaker, owner, diy enthusiast, designer, artisan... Sofs is actively engaged in the pursuit of making it happen. Archives
November 2023
Categories
All
|

FREE SHIPPING FOR ALL CANADIAN ORDERS of $100 and more
AUCUN FRAIS D'EXPÉDITION COMMANDES CANADIENNES DE $100 +
AUCUN FRAIS D'EXPÉDITION COMMANDES CANADIENNES DE $100 +
service clientSee us on FAIRE wholesales
|
|
SOCIAL MEDIA
© 2024 Sofs designs
|